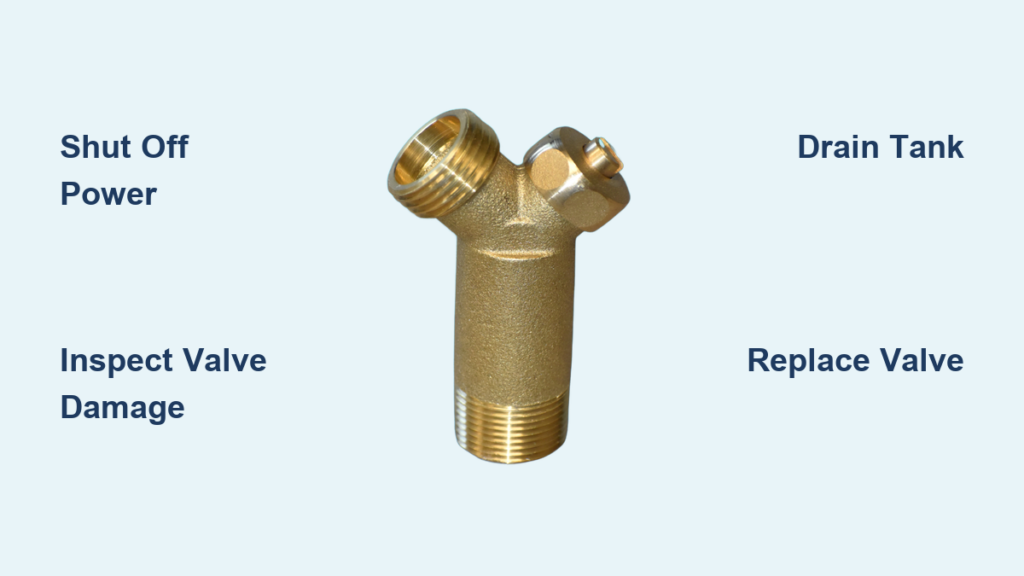
You walk into your utility room and spot a puddle forming beneath your water heater. The source? A water heater drain valve leaking steadily onto the floor. This common problem can lead to water damage, wasted energy, and rising bills if left unchecked. The encouraging news is that most drain valve leaks can be diagnosed and fixed with basic tools and a little know-how.
This guide walks you through every step of the repair process. You’ll learn how to shut down your system safely, identify the root cause, apply temporary fixes, and decide when a full replacement makes sense. Whether you’re dealing with a slow drip or an active stream, you’ll have the confidence to act fast before minor moisture turns into major damage.
Shut Off Power and Water Supply
Before touching any component, safety must come first. Cutting off energy and water flow protects you from scalding, electrical shock, and worsening leaks.
Cut Power to the Unit
For electric water heaters, locate your breaker panel and flip the switch labeled “water heater” to the off position. Confirm the power is off by checking the unit’s display panel or using a voltage tester for verification.
For gas water heaters, rotate the gas control knob to the “Pilot” or “Off” position. This stops gas flow while preserving your pilot light settings if you’re performing a quick repair.
Close the Cold Water Inlet Valve
Find the cold water supply line entering the top of your heater. It typically has a blue handle or is labeled “Cold.” Turn the valve clockwise until it stops. This prevents fresh water from entering the tank and intensifying the leak.
⚠️ Pro Tip: If the valve feels stiff or starts leaking when turned, wrap a rag around it and grip gently with pliers. Plan to replace a damaged valve later.
Inspect the Drain Valve for Damage

With the system secured, examine the drain valve closely. Most leaks reveal their cause through simple visual inspection.
Check Valve Position and Tightness
Confirm the drain valve is fully closed by turning it clockwise until snug. A partially open valve will drip continuously.
Use an adjustable wrench to gently tighten the valve body where it threads into the tank. Avoid excessive force, which can crack the valve or strip the tank threads.
Look for Cracks, Corrosion, or Drips
Common warning signs include:
– Rust or mineral deposits around the valve base
– Visible cracks in plastic or brass components
– Water dripping from the spout even when the handle is closed
Plastic valves that appear brittle or discolored almost always need replacement.
💡 Expert Note: Many older water heaters came equipped with plastic drain valves prone to cracking. Upgrading to a brass ball valve dramatically improves long-term reliability.
Drain the Tank to Minimize Leak Damage
If tightening alone doesn’t stop the leak, draining reduces internal pressure and limits water loss.
Attach a Garden Hose to the Drain Valve
Screw a standard garden hose onto the drain valve outlet. Direct the other end to a floor drain, sump pump, or outdoor area. Never route the hose into a sink or toilet that cannot handle scalding water.
Open the valve slowly using a flat wrench or the valve handle. Allow water to flow until the tank empties or the leak stops.
⚠️ Warning: Drain water can reach 120–140°F. Always wear protective gloves and keep skin contact to a minimum.
Use a Bucket for Small Leaks
For minor seepage, position a 5-gallon bucket directly beneath the valve. Empty it periodically while you arrange a permanent repair. This simple step buys valuable time.
Try These Temporary Fixes
Not every leak demands immediate valve replacement. These short-term solutions can hold you over until a permanent repair is possible.
Wrap Threads with Plumber’s Tape
If water seeps from the threaded connection, disconnect any attached hose and dry the area thoroughly. Wrap Teflon plumber’s tape clockwise around the threads, applying 3–5 layers.
Reconnect the hose or install a cap, then test for leaks. Excess tape can prevent proper sealing, so stick to the recommended number of wraps.
Install a Drain Valve Cap or Plug
A brass cap or threaded plug screws directly onto the valve outlet to block water flow. These affordable parts cost under $5 at most hardware stores.
Hand-tighten the cap first, then give it a quarter turn with a wrench. This stops spout leaks but cannot fix internal valve failure.
🛠️ Limitation: Caps only work when the valve mechanism is closed and the leak originates from the outlet, not the valve base or tank threads.
Replace a Faulty Drain Valve
When the valve shows cracks, corrosion, or refuses to seal properly, replacement offers the only permanent solution. Most homeowners complete this repair in under an hour.
Tools and Materials Needed
Gather these items before starting:
– New brass ball-type drain valve (¾-inch standard size)
– Adjustable wrench or channel-lock pliers
– Garden hose
– 5-gallon bucket
– Teflon plumber’s tape
– Clean rags or towels
✅ Why Brass? Brass valves withstand high temperatures, resist cracking in cold conditions, and outlast plastic alternatives by years.
Step-by-Step Valve Replacement
- Drain the tank completely through a hose connected to the old valve.
- Once empty, close the drain valve and disconnect the hose.
- Use a wrench to unscrew the old valve by turning counterclockwise. Apply steady pressure if it resists.
- Clean the threaded opening on the tank with a rag, removing debris and old tape.
- Wrap Teflon tape clockwise around the new valve threads, applying 3–5 layers.
- Screw the new valve in by hand until snug, then finish with a wrench. Avoid over-tightening.
- Reopen the cold water supply, allow the tank to refill, and inspect for leaks.
⏱️ Time Estimate: Plan for 30–45 minutes if you have DIY experience. Heavy sediment can extend draining time significantly.
When to Call a Professional Plumber
Some situations exceed the scope of DIY repair. Knowing when to call an expert prevents injury and additional damage.
Signs You Need a Pro
Reach out to a licensed plumber if you encounter:
– Persistent leaks after valve replacement
– Water seeping from the tank body or valve base (a sign of tank corrosion)
– A broken valve stem left inside the tank during removal
– Inability to fully drain the tank due to clogs or limited drainage access
Professional plumbers carry specialized tools such as freeze kits, pipe thread extractors, and inspection cameras to handle complex failures safely.
📞 Call Immediately If: You smell gas near a gas unit, notice bulging tank walls, or see widespread rust. These symptoms indicate end-of-life failure requiring urgent attention.
Prevent Future Drain Valve Leaks
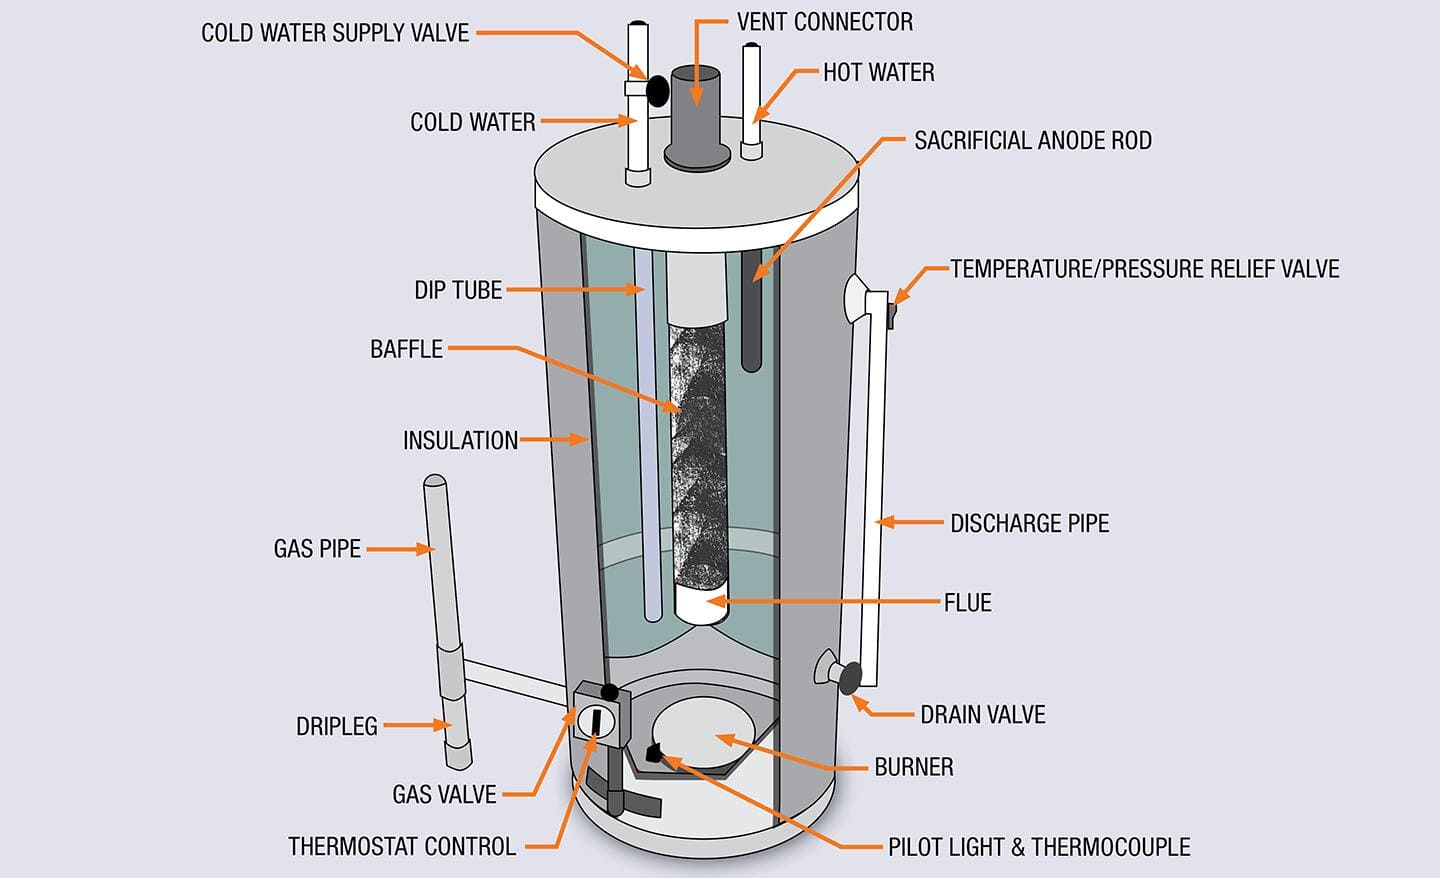
Routine maintenance keeps your drain valve functional and prevents surprise leaks. Most failures result from neglect rather than age.
Flush the Tank Annually
Sediment buildup forces frequent valve operation, accelerating wear. Annual flushing removes grit and extends valve life.
How to flush your tank:
1. Turn off power and water supply.
2. Attach a hose and drain the tank.
3. Briefly open the cold water valve to stir up sediment.
4. Repeat until water runs clear.
5. Refill the tank and restore power.
🗓️ Best Timing: Schedule flushing for spring or fall, before peak heating demand begins.
Replace Plastic Valves with Brass
Don’t wait for failure. If your heater still has a plastic drain valve, upgrade it proactively.
Brass ball valves offer clear advantages:
– Better high-temperature performance
– Crack resistance in cold environments
– Smoother handle operation
Test Valve Function Every 6 Months
Twice yearly, open and close the drain valve slightly to prevent internal seizing. Catch a few gallons in a bucket during testing.
❌ Never leave the valve open. Always close it fully and check for drips afterward.
Frequently Asked Questions About Water Heater Drain Valve Leaks
Why is my water heater drain valve leaking even when it’s closed?
A closed drain valve can still leak when internal seals wear out, the valve body cracks, or sediment prevents a tight seal. Plastic valves are especially prone to this failure as they age.
Can I use plumber’s tape to stop a drain valve leak?
Yes, plumber’s tape works as a temporary fix when the leak comes from threaded connections. It won’t repair cracked valve bodies or internal seal failures, which require replacement.
How much does it cost to replace a water heater drain valve?
A brass replacement valve costs between $10 and $30. Professional installation typically runs $100 to $200, while DIY replacement costs only the price of the valve and basic supplies.
Is a leaking drain valve dangerous?
A leaking drain valve itself poses minimal danger, but the resulting water can damage floors, create slip hazards, and promote mold growth. Address leaks promptly to avoid these secondary issues.
How long do water heater drain valves last?
Plastic drain valves typically last 5–8 years, while brass valves can function reliably for 15 years or more with proper maintenance.
Should I replace my entire water heater if the drain valve leaks?
Not necessarily. A leaking drain valve alone rarely justifies full replacement. However, if your water heater is over 10 years old and shows signs of tank corrosion, full replacement may be more cost-effective.
Final Thoughts on Fixing a Leaking Water Heater Drain Valve
A water heater drain valve leaking is a manageable problem when you act quickly and methodically. Most leaks stem from worn seals, loose connections, or aging plastic valves, all of which respond well to straightforward repairs.
Start by shutting off power and water, then assess whether tightening, capping, or full replacement will solve your specific issue. Temporary fixes like plumber’s tape or valve caps buy time, but a brass ball valve replacement delivers lasting results. Pair your repair with annual flushing and biannual valve testing to keep your system running smoothly.
If the leak originates from the tank itself or the valve breaks during removal, contact a licensed plumber without delay. For water heaters over 10 years old with multiple problems, consider full replacement rather than repeated repairs. Taking swift action today protects your home from water damage and keeps your hot water flowing reliably for years to come.