Few things are more frustrating than stepping into a cold shower when your water heater stops working. In many cases, the culprit is a pilot light that has gone out. Modern units with electronic pilot systems use an automatic spark to ignite the pilot only when needed, making them safer and more efficient than older standing-pilot models. When the spark fails or the flame extinguishes, you can often restore it yourself by following the correct relighting procedure.
This guide explains how to light a water heater with electronic pilot using clear, safety-focused steps. You will learn how to identify your ignition system, perform the lighting sequence correctly, troubleshoot common failures, and recognize when professional service is the only safe option.
Identify Your Electronic Ignition System

Before touching any controls, confirm your water heater actually uses an electronic pilot system. Mistaking it for a manual model can lead to incorrect procedures and serious safety risks.
Recognize Electronic Ignition Features
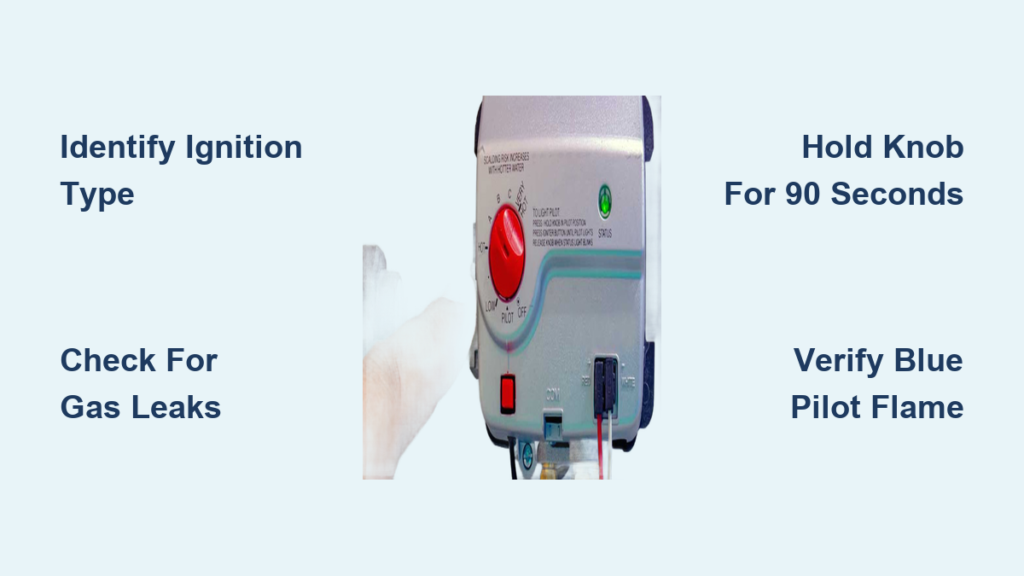
Check the front of the gas control valve for these hallmarks:
– A square igniter button, usually black or red
– An indicator light that may blink or stay solid
– No requirement for matches or lighters during normal operation
These features signal an Intermittent Pilot Ignition (IPI) system. The spark igniter lights the pilot only when heating is needed, unlike older models where a flame burns continuously.
Check for Manual Override Capability
Some electronic systems allow manual lighting if the spark fails. Look for:
– A pilot access hole behind a removable panel
– A gas knob labeled “Pilot,” “On,” and “Off”
– The ability to press and hold the knob while using a lighter
If these features are present, you can manually light the pilot during power outages or igniter failures. If there is no access panel and no “Pilot” setting, your unit likely uses a Hot Surface Igniter (HSI), which cannot be manually lit.
Follow Essential Safety Precautions
Gas appliances demand respect. A single spark inside a gas-filled chamber can cause an explosion, so follow these safety rules before starting any work.
Detect Gas Leaks Before Starting
Natural gas and propane are odorized to smell like rotten eggs. If you notice this odor:
– Do not press any buttons or create sparks
– Evacuate the home immediately
– Call your gas company or fire department from outside
Also listen for a hissing sound near gas lines. Even a small leak is dangerous and requires professional intervention.
Wait After Shutting Off the Gas
After turning the gas control knob to “Off,” wait 5 to 10 minutes. This allows residual gas to clear from the combustion chamber. Skipping this step risks a flashback explosion when you attempt ignition.
Never Force Stuck Components
If the gas control knob is stuck or difficult to turn, stop immediately. Forcing it can damage internal seals and cause leaks. This is a sign of wear that requires a technician.
Access the Pilot Assembly
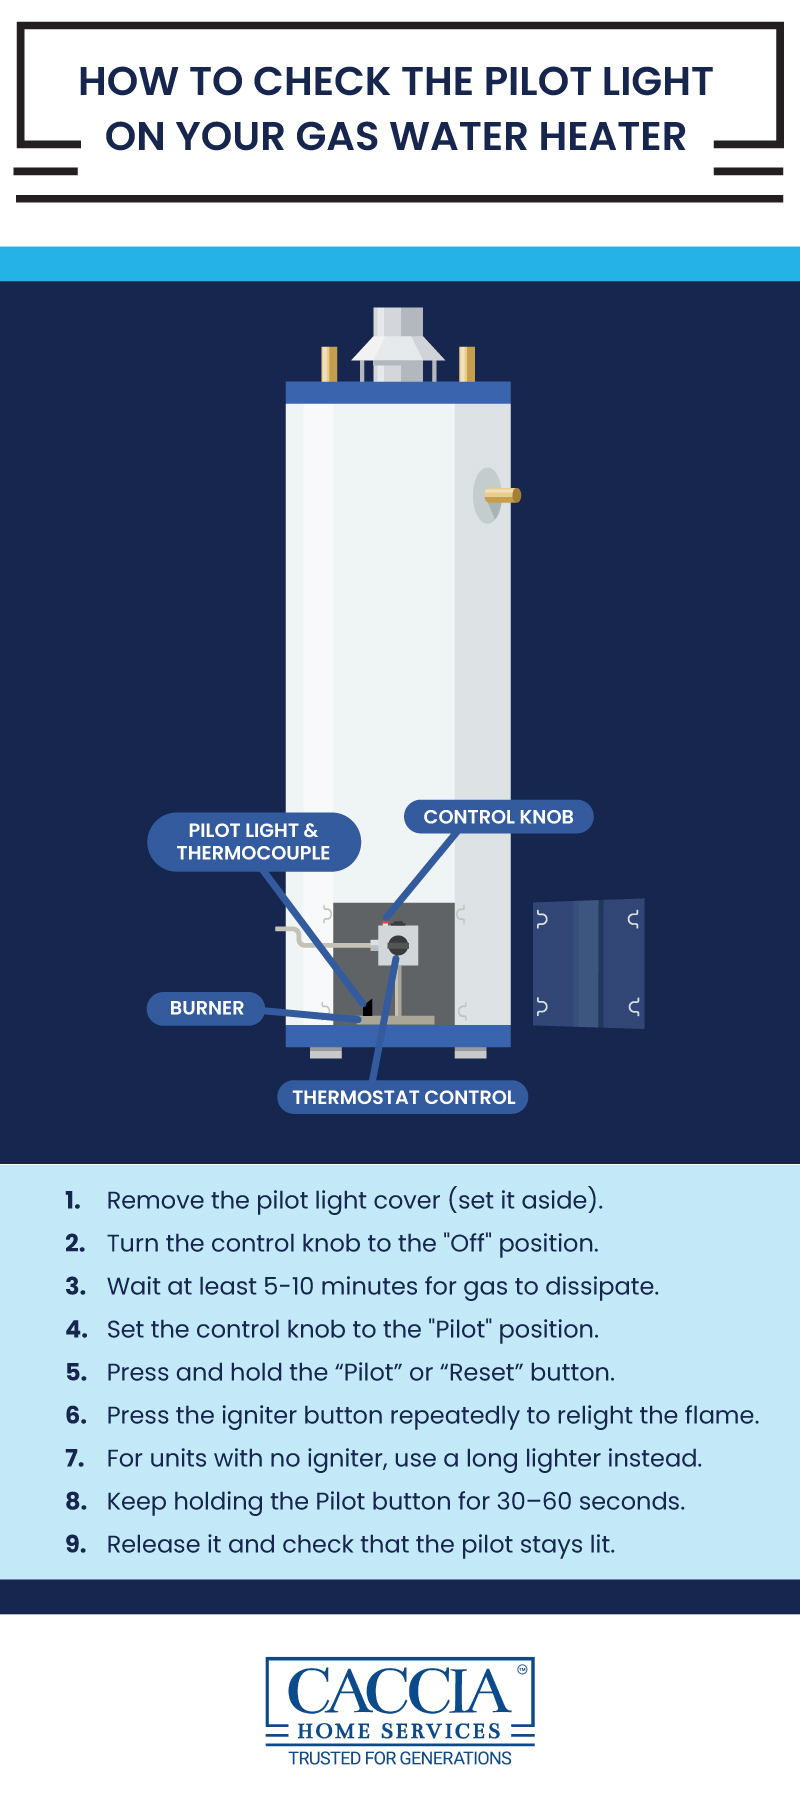
You must see the pilot orifice to confirm ignition. Most units hide this component behind a lower access panel.
Remove the Access Panel
Locate the rectangular metal panel at the base of the water heater, directly below the gas valve. On many models, lift the panel straight up off its mounting tabs. If screws are present, use a screwdriver to remove them.
Keep a flashlight ready. The combustion chamber is dark, and you will need a clear view of the pilot tube.
Locate the Pilot Orifice
Shine the light into the opening and look for:
– A small metal tube that serves as the pilot supply line
– A tiny opening where the flame should emerge
– The thermocouple sensor tip positioned near the flame
Do not touch or bend any tubes. Misalignment can prevent ignition or cause false safety shutdowns.
Set the Gas Knob to Pilot Mode
With the access panel removed, you are ready to begin the lighting sequence.
Turn the Knob to “Pilot”
Rotate the gas control knob so the indicator points to “Pilot.” This cuts off gas to the main burner and routes it only to the pilot tube.
Press and Hold the Knob
Push the knob all the way down and hold it firmly. This manually opens the gas valve to the pilot. You must keep the knob depressed throughout ignition and for up to 90 seconds afterward. Releasing too soon cuts gas flow and extinguishes the pilot.
Ignite the Pilot Light
Your method depends on whether the electronic spark is functioning.
Use the Electronic Igniter
While holding the gas knob down, press the square igniter button repeatedly at about one press per second. Watch the pilot area closely for:
– A clicking sound
– Small sparks jumping near the pilot orifice
– A flame catching and staying lit
If the indicator light turns on, the system has detected successful ignition.
Try Manual Lighting If the Spark Fails
If no sparks appear or the pilot will not catch, you can attempt manual lighting if your unit supports it:
1. Keep holding the gas knob down
2. Insert a long-reach lighter or match through the access hole
3. Place the flame directly at the pilot orifice
The gas should ignite within seconds. Once lit, remove the lighter but keep holding the knob.
Warning: Never use a propane torch or short lighter. You risk burning your hand or igniting surrounding materials.
Heat the Thermocouple Fully
This step is the most commonly rushed, and it is the top reason pilots go out immediately after release.
Hold for 30 to 90 Seconds
After the pilot ignites, continue holding the gas knob for at least 30 seconds. A full 90 seconds is recommended to ensure the thermocouple heats completely. The thermocouple must generate a small electrical current (about 25 to 30 millivolts) that signals the gas valve to remain open.
Slowly Release the Knob
After the hold period, slowly let go of the knob and watch the pilot flame closely.
– Success: Flame remains steady and blue
– Failure: Flame goes out, meaning the thermocouple did not heat enough or is faulty
If the flame extinguishes, repeat the process and hold longer. Persistent failure usually means the thermocouple needs replacement.
Turn the System On and Restore the Panel
Once the pilot stays lit on its own, finish the activation process.
Rotate the Knob to “On”
Turn the gas control knob from “Pilot” to “On.” This enables the main burner to fire whenever the tank needs heating.
Replace the Access Panel
Slide or screw the panel back into place. Leaving it off disrupts proper airflow and can trigger safety shutdowns.
Verify Hot Water Production
Wait 30 to 60 minutes, then check a hot water tap. You should feel increasing warmth as the tank reheats.
Troubleshoot Common Pilot Failures

Even with correct steps, problems can occur. Here is how to diagnose the most frequent issues.
Pilot Will Not Stay Lit After Release
Insufficient Hold Time
Repeat the process and hold the knob for the full 90 seconds.
Faulty or Dirty Thermocouple
If the pilot lights but dies upon release even after a long hold, the thermocouple may be dirty or failing. Clean the tip with fine sandpaper or replace the component.
Misaligned Thermocouple
The flame must engulf the sensor tip. If positioned too far away, it will not heat properly. Gently reposition the sensor so the flame touches it directly.
Pilot Will Not Ignite at All
No Spark from the Igniter
Press the igniter button and look for sparks. If none appear, the cause could be a dead battery, a failed control board, or a broken wire. Without a manual override, professional repair is required.
Air in the Gas Line
After long shutdowns, air can block gas flow. Hold the knob down for up to 2 minutes to purge air from the line.
Clogged Pilot Orifice
Dust or debris can block gas at the orifice, producing a weak flame or no ignition. This requires professional cleaning. Do not attempt to clear it with wire.
Indicator Light Patterns
Some models use blinking lights to signal specific faults:
– One blink: Normal operation
– Three blinks: Ignition failure
– Four blinks: Flame sensing fault, usually thermocouple related
Refer to your unit’s manual for exact code definitions.
Know When to Call a Professional

Not every issue can be resolved with DIY steps. Stop and contact a licensed technician in these situations.
Your Unit Has No Manual Override
If there is no access panel or no “Pilot” setting, your water heater likely uses a Hot Surface Igniter. These systems have no standing pilot and cannot be manually lit. Electrical faults require professional diagnosis.
Repeated Failures After Correct Procedure
If you have followed every step correctly and the pilot still will not stay lit, the thermocouple is likely bad, the gas control valve may be failing, or the control board could be defective. These parts require professional replacement.
You Smell Gas at Any Point
Even a faint gas odor means stop immediately, evacuate, and call emergency services. Do not attempt to restart the unit.
Maintain Reliable Pilot Performance
Simple maintenance habits can prevent future pilot problems.
Inspect Flame Color Regularly
Remove the access panel and check the pilot flame periodically:
– Healthy flame: Solid blue, steady, wrapping around the thermocouple
– Unhealthy flame: Yellow, flickering, or lifting off the orifice
A yellow flame indicates incomplete combustion or dirty components. Schedule a professional cleaning if you notice this change.
Keep the Area Clean and Dry
Dust, lint, and moisture can interfere with ignition. Keep the area around the water heater free of laundry, boxes, and cleaning supplies. Ensure the space is dry and well-ventilated.
Test the Procedure Annually
Even if everything is working fine, walk through the pilot lighting procedure once a year. This ensures you know exactly what to do if hot water fails during cold weather.
Frequently Asked Questions About Electronic Pilot Water Heaters
How do I know if my water heater has an electronic pilot?
Look at the gas control valve for a square igniter button (usually black or red) and an indicator light. These features indicate an electronic ignition system rather than a manual standing-pilot model.
Why does my pilot light go out right after I release the knob?
The thermocouple has not heated enough to keep the gas valve open. Repeat the process and hold the knob down for a full 90 seconds before releasing. If the problem continues, the thermocouple may be dirty, misaligned, or faulty.
Can I manually light an electronic pilot water heater?
Only if your unit has a manual override option, meaning there is a pilot access hole and a “Pilot” setting on the gas knob. Units with Hot Surface Igniters have no standing pilot and cannot be manually lit under any circumstances.
How long should I wait after turning the gas off before relighting?
Wait 5 to 10 minutes. This allows any residual gas in the combustion chamber to dissipate, reducing the risk of a flashback explosion during ignition.
What does a yellow pilot flame mean?
A yellow or orange flame typically indicates incomplete combustion or dirty burner components. A healthy pilot flame should be solid blue and steady. Schedule a professional inspection if you notice a color change.
When should I stop trying and call a technician?
Call a professional if you smell gas at any point, if the unit has no manual override and the igniter fails, or if the pilot repeatedly goes out after correct attempts. Forcing the issue can damage components or create dangerous leaks.
Key Takeaways for Lighting a Water Heater with Electronic Pilot
Restoring hot water through a proper relighting procedure is straightforward when you respect the safety requirements. Always identify your ignition system first, wait the full 5 to 10 minutes after shutting off the gas, and hold the regulator knob down for at least 90 seconds after the pilot ignites. Watch for a steady blue flame and a functioning indicator light as signs of success.
If the pilot refuses to stay lit after repeated correct attempts, or if you detect any gas odor, stop immediately and contact a licensed technician. Your next step is to gather your flashlight and long-reach lighter, confirm your system type, and follow the procedure carefully. Safe lighting protects both your home and your peace of mind.