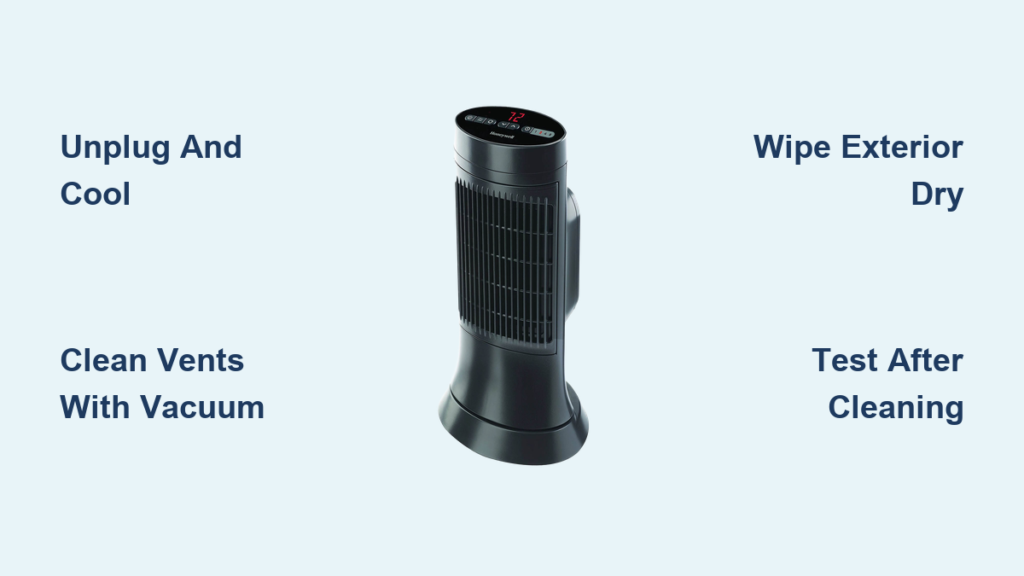
Is your Honeywell space heater making unusual noises or emitting a burning smell when you turn it on? Dust and debris accumulate in the vents and internal components over time, reducing efficiency and potentially creating safety hazards. Knowing how to clean a Honeywell space heater properly is essential for maintaining peak performance and ensuring safe operation. This guide walks you through every step, from unplugging and cooling to vacuuming grills and testing after cleaning.
Whether you’re prepping for winter or storing your heater away, these manufacturer-backed tips will help you keep your unit working safely and efficiently. With the right tools and precautions, you can complete the cleaning process in under 30 minutes without opening the case or risking damage.
Safety First: Unplug and Cool Your Heater
Before touching any part of your space heater, safety must come first. Honeywell units generate high heat and contain sensitive electrical components. Cleaning while plugged in or still hot can lead to burns or electrical shock.
Unplug from the Power Source
Always disconnect the heater from the wall outlet before starting. Do not rely on turning it off using the control panel alone. A full power disconnect ensures zero risk of accidental activation during cleaning.
Wait for Complete Cooling
Even after turning off, internal parts like the ceramic heating element remain hot for 20 to 30 minutes. Touching them can cause serious burns. Let the unit sit undisturbed until it reaches room temperature. A quick hand test near (not on) the grill can confirm it is cool enough to handle.
Pro Tip: Schedule cleaning right after use so it becomes part of your routine, but never start until the unit is fully cooled.
Exterior Surface Cleaning Steps
Dust, fingerprints, and grime collect quickly on the outer casing, especially in high-traffic areas. Cleaning the exterior improves appearance and helps prevent debris from being drawn into the air intake.
Wipe with Dry or Damp Cloth
Use a soft, lint-free cloth to gently wipe down the entire surface. For light dirt, a dry cloth is sufficient. For smudges or sticky spots, slightly dampen the cloth with water and a drop of mild dish soap. Never spray liquid directly onto the heater.
Avoid Moisture in Vents
Keep all moisture away from control panels, grills, and seams. Excess dampness can seep inside and damage electrical components or cause short circuits.
Dry Immediately
After wiping, go over the surface with a dry towel to remove any residual moisture. This step is crucial before plugging the unit back in.
Cleaning Front and Rear Vents

The front and rear grills are dust magnets. Clogged vents restrict airflow, forcing the fan to work harder and increasing the risk of overheating.
Loosen Dust with Soft Brush
Use a soft-bristled brush, like a clean paintbrush or old toothbrush, to gently scrub both intake (rear) and exhaust (front) grills. Work in small circular motions to dislodge compacted dust without bending the fins.
Vacuum with Brush Attachment
Follow brushing with a vacuum cleaner equipped with a brush or crevice tool. Hold the nozzle close to the grill and move slowly to suction up loosened particles. Pay extra attention to corners and edges where dust accumulates.
Visual Cue: If you see visible dust clumps or gray buildup, continue brushing and vacuuming until the grills look clean.
Internal Dust Removal with Limited Access
Unlike some brands, Honeywell space heaters are sealed units with no user-serviceable internal parts. However, light surface dust near accessible vents can still be addressed without opening the case.
Use Vacuum Nozzle Carefully
If your model has removable front or rear panels (as noted in the manual), remove only those parts. Use the vacuum’s narrow nozzle to clean visible interior surfaces around the fan and heating element housing. Do not insert fingers, tools, or brushes deep inside.
Never Disassemble the Unit
Removing screws from the motor housing or fan assembly is not recommended. Honeywell does not support full internal disassembly by users. Doing so may damage wire connections, misalign the fan, or void your warranty.
Warning: Attempting Sunbeam-style disassembly (removing screws to access the motor) on a Honeywell heater can cause permanent damage and create fire hazards.
Why You Shouldn’t Clean Internal Components
You may be tempted to clean the fan blades or ceramic heating element directly, but with Honeywell models, that is unnecessary and risky.
Let Heat Burn Off Light Residue
Minor dust on the heating element will typically burn off during the first few minutes of operation after cleaning. This causes a temporary burning smell, which is normal if it fades quickly.
Monitor for Persistent Odors
If the smell lasts more than 10 to 15 minutes or intensifies, shut off the heater immediately. This could indicate remaining debris or an internal issue requiring professional inspection.
Do Not Touch Internal Components
The fan and heating core are precision-engineered parts. Manual cleaning can bend blades, scratch elements, or disrupt thermal sensors. Stick to external vent maintenance only.
Model-Specific Guidance: HCE323V

The Honeywell HCE323V is a popular portable heater with overheat protection and tip-over safety. Its maintenance is straightforward but limited.
No Internal Service Required
This model has no user-replaceable parts. All cleaning should focus on external surfaces and grills.
Recommended Vent Cleaning Frequency
Vacuum the intake and exhaust grills every 1 to 3 months, depending on usage. In dusty homes or pet-friendly environments, monthly cleaning is ideal.
Where to Find Official Instructions
Always refer to the Honeywell user manual for your exact model number. Manuals are available online at Honeywell Home Support and include diagrams and safety warnings specific to your unit.
Tools and Supplies You’ll Need
Having the right tools makes cleaning faster, safer, and more effective.
Essential Cleaning Kit
• Soft lint-free cloth
• Soft-bristled brush (paintbrush or toothbrush)
• Vacuum with brush and crevice attachments
• Mild dish soap (for exterior only)
What to Avoid
• Harsh chemicals (ammonia, bleach)
• Abrasive pads or steel wool
• Water or steam inside the unit
• Screwdrivers or pliers for internal access
Expert Note: Using compressed air can blow dust deeper into the unit. Only use it if recommended by Honeywell, and never at high pressure.
Post-Cleaning Safety Check
After cleaning, do not plug the heater in and walk away. Perform a quick safety test to ensure everything works as expected.
Inspect for Obstructions
Double-check that all vents are fully clear and no cloth fibers or debris were left behind during vacuuming.
Ensure Stable Placement
Set the heater on a flat, level surface. Tipping or instability can trigger the safety switch or cause uneven operation.
Test Run for 10 Minutes
Plug in the unit and run it on low or medium heat for at least 10 minutes in a well-ventilated area. During this time, listen for unusual noises (grinding, rattling), confirm consistent heat output, and watch for smoke or persistent burning smells. If anything seems off, unplug immediately and consult customer support.
Proper Storage for Longevity
Proper storage prevents dust buildup and extends your heater’s lifespan.
Clean Before Storing
Never store a dirty heater. Dust left inside can harden and become harder to remove later.
Choose a Dry, Dust-Free Location
Store in a closet, shelf, or basement away from humidity and pests. Moisture promotes corrosion and mold growth.
Use a Breathable Cover
Wrap the heater in a cotton sheet or store it in its original box. Avoid plastic bags because they trap moisture and encourage condensation.
Reinspect Before Next Use
Before turning it on again, give it a quick wipe-down and vacuum the vents. Run a short test cycle to confirm safe operation.
Common Mistakes to Avoid
Even well-intentioned users make errors that compromise safety or performance.
Mistake: Opening the Case Like Other Brands
Some users try to disassemble their Honeywell heater like a Sunbeam or DeLonghi model. This is not safe or supported. Honeywell units are sealed for safety and warranty compliance.
Mistake: Using Water or Steam
Spraying water or using a steam cleaner can short-circuit electronics and degrade insulation. Stick to dry or slightly damp cloths.
Mistake: Ignoring Burning Smells
While initial odors are normal, persistent smells after cleaning may signal trapped debris. Do not ignore them. Shut down and recheck.
Mistake: Skipping Regular Maintenance
Waiting until the heater malfunctions is too late. Routine cleaning every few months prevents problems before they start.
Warranty and Maintenance Facts
Your Honeywell heater likely comes with a 5-year limited warranty, but only if used and maintained correctly.
Cleaning Keeps Warranty Valid
As long as you follow manufacturer guidelines, especially avoiding internal disassembly, your warranty remains intact.
Unauthorized Repairs Void Coverage
Any attempt to open the unit, replace the fan, or modify wiring voids the warranty. Honeywell does not support DIY repairs.
When to Contact Support
If your heater shows signs of malfunction (no heat, strange noises, tripping breakers), contact Honeywell customer service instead of trying to fix it yourself.
Key Takeaways for Keeping Your Honeywell Heater Clean
• Unplug and cool the heater before starting any cleaning
• Clean every few months, especially before and after the heating season
• Use dry cloth and vacuum for vents and exterior surfaces
• Never open the case or touch internal components
• Avoid water, chemicals, and tools inside the unit
• Run a test cycle after cleaning to ensure safe operation
• Store clean and covered in a dry place
By following these steps, you will keep your Honeywell space heater running efficiently, quietly, and safely without risking damage or voiding your warranty. For model-specific details, always consult the official Honeywell user manual. A little maintenance goes a long way in home comfort and safety.
Frequently Asked Questions About Cleaning Honeywell Space Heaters
Can I use water to clean my Honeywell space heater?
No. Never use water, liquid cleaners, or wet cloths on internal components or electrical parts. Moisture can cause short circuits and damage electronics. Use only a dry or slightly damp cloth for the exterior, and keep all liquids away from vents and controls.
How often should I clean my Honeywell space heater?
Perform routine maintenance every few months, especially before and after the heating season. More frequent cleaning may be necessary in dusty environments or if the heater is used daily. Regular cleaning prevents dust buildup, maintains optimal airflow, and reduces fire hazards.
Why does my heater smell like burning dust after cleaning?
This is normal. Minor dust remaining on the heating element burns off during the first few minutes of operation. The smell should dissipate within 10 to 15 minutes. If it persists or intensifies, shut off the heater immediately and check for remaining debris.
Can I disassemble my Honeywell heater to clean inside?
No. Honeywell space heaters are sealed units with no user-serviceable internal parts. Unlike some brands (such as Sunbeam), Honeywell does not support internal disassembly. Attempting to open the case voids your warranty and can create fire hazards.
What tools do I need to clean a Honeywell space heater?
You will need a soft lint-free cloth, a soft-bristled brush (like a paintbrush or toothbrush), a vacuum with brush and crevice attachments, and mild dish soap for the exterior only. Avoid harsh chemicals, abrasive pads, and compressed air unless specifically recommended by Honeywell.